A new garden doesn’t have to begin with a truckload of plants. Sometimes the most useful thing you can do is cover the ground, give it some time, and start changing the conditions those plants will eventually grow in.
That’s where we are with our neighbor’s front garden in Raleigh. We introduced the project about two months ago, and now we’ve spread the first substantial layer of wood chips. There are still plants to remove, utilities to locate, and a little sidewalk work to figure out. But the soil-building part has started.
The goal is not just to make this space look different. It’s to give a low-maintenance garden a better chance of succeeding in some fairly difficult conditions.
Key Takeaways
- Wood chips protect exposed soil and gradually add organic material as they decompose.
- Moisture strongly influences how quickly a fresh wood chip layer settles and breaks down.
- Locate underground utilities before removing established plants or digging planting holes.
- Plant selection must account for drought and tree-root competition, not just shade.
Table of Contents
- Start by Understanding the Space
- Why Wood Chips Are the First Step
- How Much Wood Chip Mulch We’re Using
- Moisture Determines How Quickly the Chips Break Down
- What We’re Trying to Repair Under the Old Lawn
- Before Digging, Locate Utilities and Clear the Problem Plants
- Keep Access in the Plan and Reuse What’s Already Here
- Planting Will Happen in Stages
- Better Soil Won’t Make the Maple’s Roots Disappear
- The Next Step Is Some Work, Then Some Patience
Start by Understanding the Space
This project includes the front garden and a generous side space between the houses. On our property, there’s only about 6 feet between the house and the property line. We’ve planted a magnolia there, but we also have to preserve a path.
I want to be able to get all the way around our house to spread wood chips, mulch beds, rake leaves, prune, and do whatever else needs doing. During open garden events, that path also gives people a way to move through the garden. A landscape still has to be accessible after you fill it with plants.
The neighbor’s side gives us roughly 15 to 18 feet to work with. That’s quite a bit more planting room. Depending on the season, it ranges from part shade to shade.
But shade is only part of the story. The biggest challenge is root competition from a large red maple. We can improve the soil, but that tree is still going to be here, taking up moisture and occupying much of the ground where we want to plant.
Why Wood Chips Are the First Step
We’ve used wood chips in our own front and back gardens, and they’ve made an enormous difference in the soil and in how the plants respond. We do very little fertilizing there. Most of the ongoing work is weeding, replenishing mulch, and whatever pruning an individual plant needs.
That doesn’t mean putting down wood chips eliminates gardening. It means we’re building a soil environment that does more of the work for us.
A useful mix of tree material
The wood chips we’re using contain much more than chunks of wood. There are leaves, bark, small twigs, buds, and pieces of older growth mixed together. I picked up oak leaves right out of this load.
Think about the usual explanation for making compost: you combine browns and greens, mixing different kinds of organic material. A load of chipped tree material brings a mixture along with it. You get the woody material and the leafy, younger parts of the tree together.
It’s not finished compost. But it gives the decomposition process a varied starting material, right on the soil surface.
Protecting the soil while it improves
That surface cover has a job to do before it breaks down. It shades and protects the ground, helps conserve moisture, and creates a more sheltered environment for earthworms and other soil life.
Rather than leaving the soil exposed while we decide what to plant, we’re putting that protective layer in place now. As the chips decompose, they gradually contribute organic material to the soil below.
How Much Wood Chip Mulch We’re Using
For this initial garden conversion, I’m aiming for a loose wood chip layer about 6 to 8 inches deep. That is the starting treatment for this space, not a direction to keep adding another 6 to 8 inches every time it needs mulch.
The load we moved for this part of the project was probably 17 or 18 cubic yards. Josh, a Virginia Tech student who had stopped by to tour the garden, offered to help when he saw the chips. Between Josh, Steph’s son Miguel, and me, we moved the pile in about an hour to an hour and fifteen minutes. Then I raked the chips out reasonably flat.
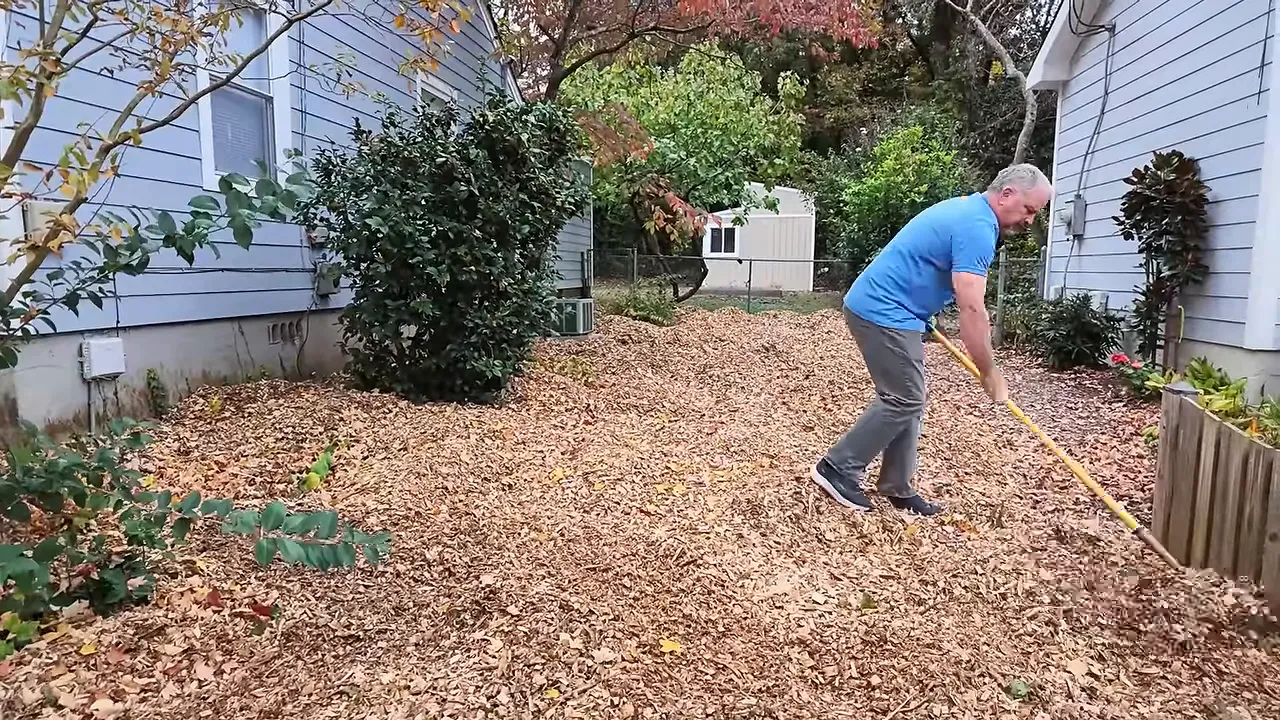
Some areas are already where I want them. In the front, I checked through the layer and found about 8 inches of chips. A few places farther back are still a little thin, so I’ll move more material into those spots.
We also have another pile intended for our own paths. I may borrow a little from that to finish this application. Getting the material distributed evenly is part of the job, especially when you’re moving this kind of volume with wheelbarrows.
Moisture Determines How Quickly the Chips Break Down
One thing I don’t want to gloss over is rainfall. Wood chips need moisture to break down at a reasonable pace.
When we started this process in our front and back gardens, rainfall was average or above average. The chips settled and decomposed, and we saw the ground change.
Our native garden has been a different experience. We put chips down there roughly a year and a half ago, and much of that material is still recognizable. It has been dry for a long time. Without enough moisture, the process moves much more slowly.
So I’m hoping for a moist winter here. I want this loose layer to settle, mat down some, and begin decomposing before we get into the main planting season.
The calendar alone doesn’t tell you how ready a bed is. Eighteen months in dry conditions is not the same as eighteen months with dependable rainfall.
What We’re Trying to Repair Under the Old Lawn
This space has been mowed grass for a very long time, but that hasn’t necessarily meant it was building good topsoil.
Thin turf that’s repeatedly mowed too low can leave the ground poorly protected. Every heavy rain can carry away a little soil and organic material. It’s easy not to notice because the loss happens gradually, year after year.
Compare that with tall grassland, where accumulated plant material protects the surface and contributes to a humus layer. That cover moderates moisture and shelters the soil life underneath.
Scalping a thin lawn doesn’t allow much of that protection to develop. Grass clippings may be returned, but if the surface material keeps moving away with runoff, you’re not gaining what you might expect.
This house was probably built around 1948. Looking at the ground here, we’re essentially working with exposed subsoil rather than a rich topsoil layer built over those decades.
That’s why the chips matter. We’re starting by protecting what’s here and creating conditions where organic material can begin accumulating instead of disappearing.
Before Digging, Locate Utilities and Clear the Problem Plants
The wood chips are down across much of the space, but we haven’t started the serious digging yet. Before we do, I need to have the underground utilities marked.
Electric service comes in overhead, but there’s cable or fiber in this area. I’ve already managed to cut a shallow communications line on our side once. I don’t need to repeat that experience next door.
Water and natural gas come in on the other side. Even where I have a general idea of the route, I’m getting the lines marked. In the United States, contact 811 before digging. Knowing approximately where something runs is not the same as knowing where it is when you put a shovel in the ground.
Plants that need to come out
There’s a fairly substantial cleanup list here:
- A forsythia that no longer fits the plan.
- English ivy, Chinese privet, and Japanese privet.
- Wisteria, a grape vine, and other unwanted vines.
- Spreading liriope, Liriope spicata.
- A stressed crape myrtle growing in too much shade.
- A poorly placed fig and a struggling hydrangea.
- Other unwanted seedlings and growth that need to be sorted out as we work.
The spreading liriope is one I plan to dig out. It’s extremely persistent, and I’m not counting on spraying it to solve the problem.
We’ve deliberately left one section without wood chips for now. There are irises there that I want to divide and relocate to the back before clearing the remaining growth. Once that digging is finished, we’ll cover that section too. There are more chips waiting near the street for exactly that purpose.
The crape myrtle tells us a lot about this site
The crape myrtle has been topped severely, the kind of pruning people call crape murder. Even after that treatment, it only produced about 3 feet of growth this season. I would have expected much more vigorous regrowth, perhaps around 8 feet, from that sort of cut.
Instead, it’s dealing with drought, shade, and competition from the maple all at once. It also has powdery mildew. This is not a plant thriving in its location.
Removing it will take some work. It’s well anchored, and I expect maple roots to complicate the digging around it.
Keep Access in the Plan and Reuse What’s Already Here
Soil preparation isn’t the only improvement we can make before spring. The neighbor’s narrow concrete sidewalk could use a little more width to feel better proportioned to the house.
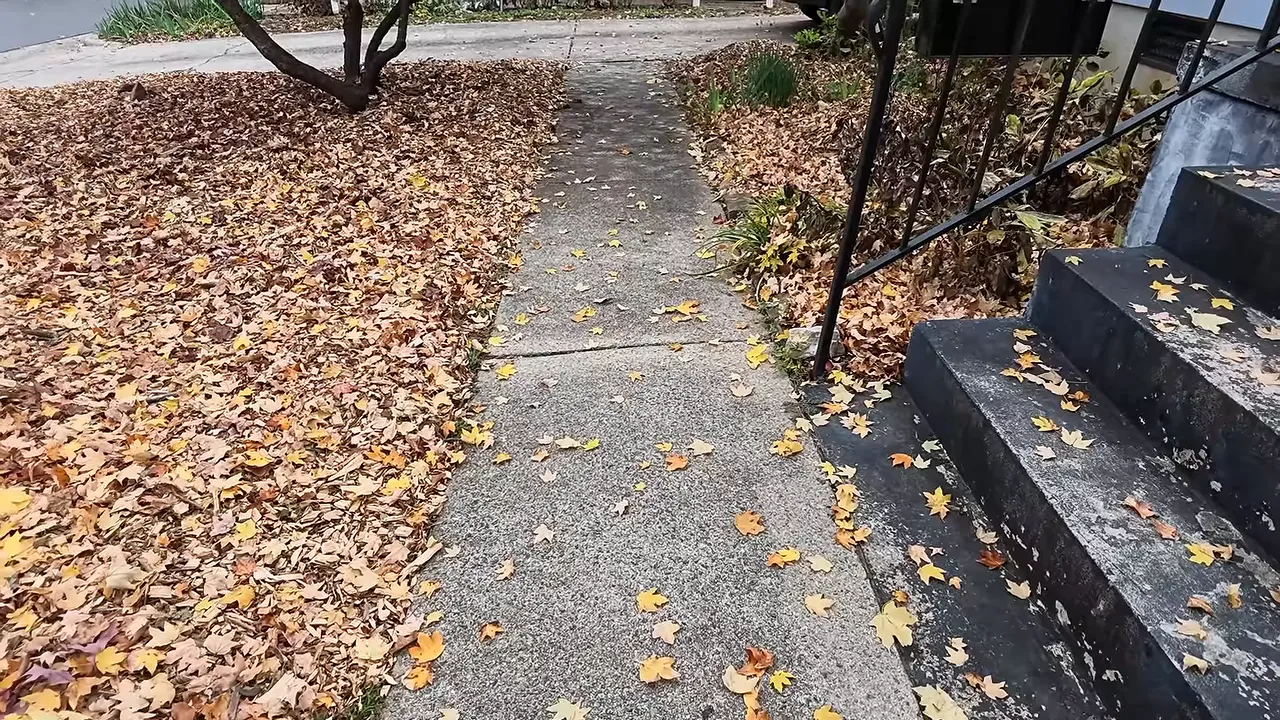
We’ve already found about 40 old bricks here, and we haven’t really started digging. That’s pretty typical for this neighborhood. Our own back patio includes lots of bricks we found buried around our property.
I’m planning to use these recovered bricks along the sidewalk edges to add roughly 6 or 8 inches to its width. The exact arrangement will depend on how many usable bricks we end up with. I may run them sideways along each side rather than use an arrangement that takes more material.
It’s a small change, but it follows the same principle as preserving the path around our house: a garden needs to work for the people moving through it, not just for the plants growing in it.
Planting Will Happen in Stages
Most of the planting is planned for late winter and early spring, with the larger push likely around March and continuing through spring and summer.
I’m comfortable installing woody shrubs before all these chips have decomposed. I’ll pull the chips back, dig a planting hole in the soil underneath, and set the shrub there. The wood chip layer itself is not the planting soil.
A few shrubs from our front garden will be among the first plants moved over. We may add some bulbs as well. We have bulbs from Colorblends available, but I haven’t settled that part of the plan yet.
Annuals and herbaceous perennials can wait while the material settles and breaks down a bit more. There’s no advantage in rushing every type of plant into the space at the same time.
We’re keeping the purple smoke bush. Most of the new planting will emphasize drought tolerance and low maintenance, with one small area near the driveway reserved for annual color.
Better Soil Won’t Make the Maple’s Roots Disappear
This is the part that will guide every plant choice. The red maple has large surface roots and a fibrous root system, and I expect to encounter its roots throughout the space.
Even established plants that people tend to think of as tough, including azaleas, nandinas, forsythia, and that crape myrtle, struggled as soon as conditions turned dry. The maple keeps winning the competition for moisture.
So we can’t simply choose plants labeled for shade and assume we’re done. We need plants suited to dry conditions and substantial root competition, too. I don’t want a garden full of things that need constant babying just to stay alive.
The maple also produces an impressive crop of seedlings. Steph estimates we pulled about 2,000 maple seedlings out of our garden this year. That’s another maintenance task we’ll be dealing with.
And the tree has its own difficulties. A small front lot, summer temperatures around 95 degrees, and repeated pruning around overhead electric lines are not an easy setting for it either. The stress isn’t limited to the plants underneath.
The Next Step Is Some Work, Then Some Patience
Our immediate plan is straightforward:
- Have the underground utility lines marked.
- Remove the unwanted shrubs, vines, and spreading liriope while saving the irises we want to relocate.
- Finish spreading wood chips in the remaining sections and top up thin spots.
- Work out the brick edging for the narrow sidewalk.
- Let the covered ground rest before the main planting begins.
We’ve usually handled our garden projects ourselves, but this season’s workload includes 36 cubic yards of chips across the projects, 1,000 bulbs, about 50 new plants, transplants, and crape myrtles to dig. Having Miguel involved as he builds his landscape business is helping us take on the heavier work without pretending there are extra hours in the day.
For now, this new garden looks mostly like a layer of wood chips. That’s fine. The important work is getting started underneath, and giving it a little time is part of starting the garden the right way.


